Planning the Circuit Boards

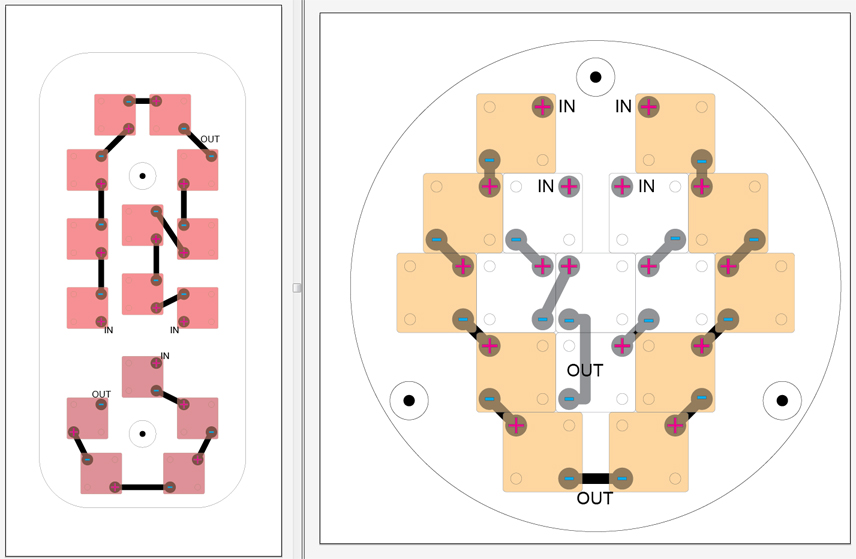
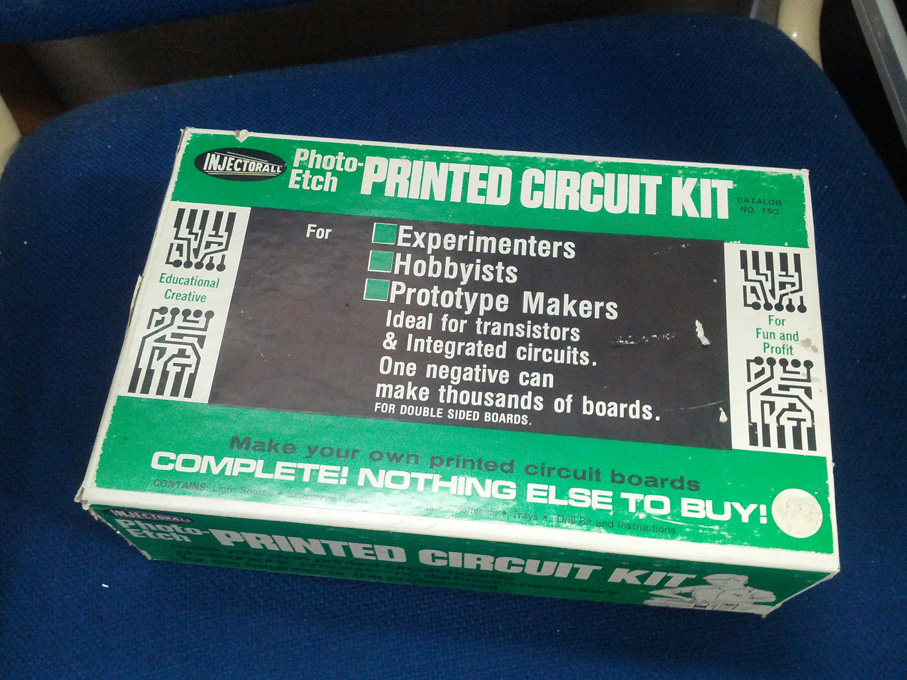
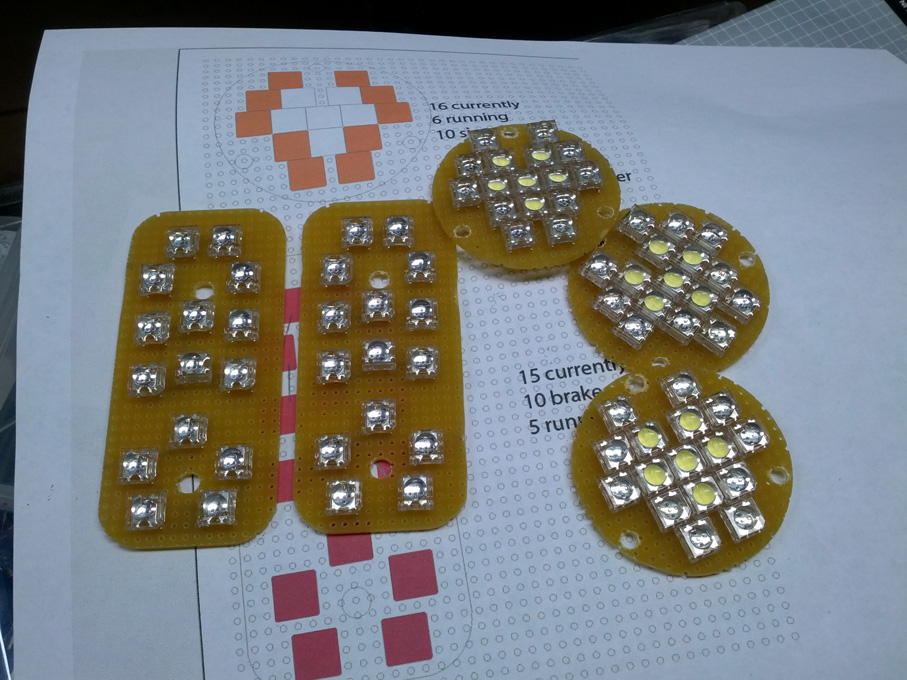
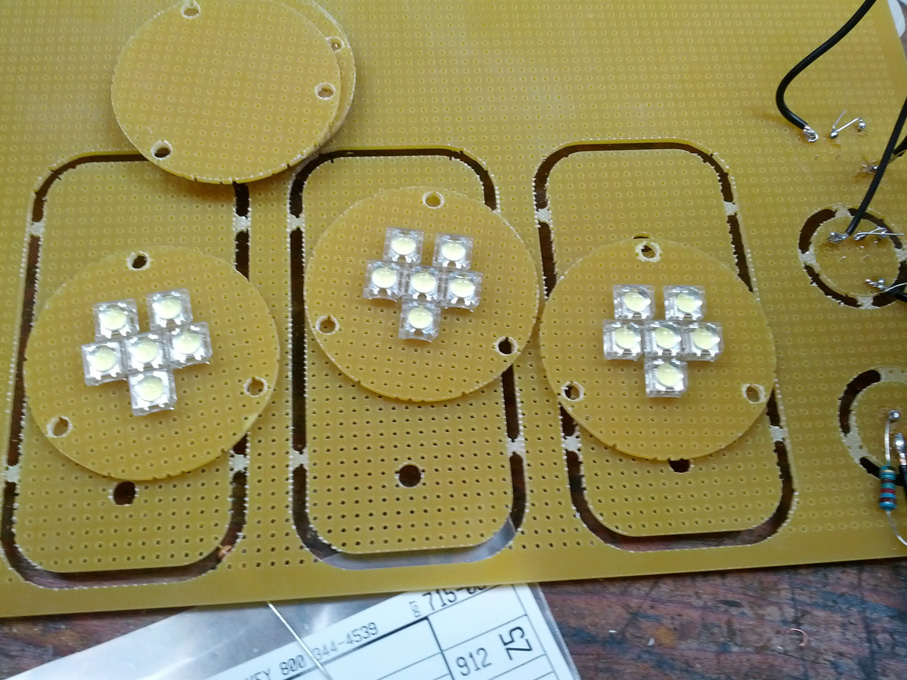
I get an idea, and I usually just run when it. Especially when the idea excites me creatively. A hour or so at Illustrator and I’ve got the planned mask laid out for the copper clad circuit board etching. The black lines with the +/- on them will be printed out on transparency film and hopefully I will get good results. The kit I have is a “positive mask” style, meaning I will have to reverse the image to properly mask off the copper.

Posted in 1966 Morgan +4, Upgrades | Leave a comment

Switching lights

So I got a bit more done last night with the LED lights, but got a bit frustrated with the slow progress. Having to manually build bridges between each LED either by solder or wire (both a royal pain at that size) was starting to get rather tedious. At one point I exclaimed aloud “why didn’t I just do this with a printed PCB setup?”… and then I stopped and thought… “wait… why *don’t I* just do this with a printed PCB setup?”. I got a bit farther along, and after blinding myself with a test of the brake light running lights, decided to call it a night and do some reading.

A bit of digging around turned up more than a few sources of light-sensitive copper clad boards (even Fry’s… which was a bit surprising). The only downside I’ve discovered is that I haven’t come across any with the grid holes already drilled. While this isn’t in any way a deal breaker (CNC router, hello~!), it does mean a slight bit more setup time. I stopped to ask my electrical engineer coworker if he’d seen the kits for doing these kinds of things before, and that proved to be a very smart move.

He had me follow him to the tools / chemicals cabinet on the company’s assembly floor, and dug out a whole “DIY Copper Clad PCB” kit that he’d said had been sitting around for a long while and no one had touched it. I grabbed it and made off with it and some laserjet transparency film we haven’t used in years, and now I’m going to start designing the circuits for the MogRod LED Lights 2.0! This does mean I’m going to have to reorder the LED’s, as I would rather do that than waste more time trying to de-solder all of them. It’s such a small cost in the scheme of things that it’s worth doing so, though.

Posted in 1966 Morgan +4, Upgrades | Leave a comment

Up, Up & Away!

Had quite a cool day in the sun today! I drove over to Watsonville (near Santa Cruz) for the annual “Watsonville Fly-In & Airshow“. I’ve been to it once before and enjoyed it just as much this time. I’ll let the photos and video do the talking, but man, nothing gives me the chills like hearing a group of P-51 Mustangs doing low altitude high speed fly-bys!

Also, started plasti-dipping the RK Sport hood I picked up last weekend for my ’01 Corvette. Hopefully it’ll be fully coated, dried, and installed before the weekend’s over!


Posted in 2001 Corvette, General, Other Cars | Leave a comment

The “Kit Car” C5 Corvette

Sharing this little bit of fun reading: http://cartechstuff.blogspot.com/2013/08/the-c5-corvette-kit.html

Did you know that General Motors made a (very) limited run of “build your own C5 Corvettes” for the buyer to make their own race car with? I sure didn’t!

Posted in 2001 Corvette, Other Cars | Leave a comment

Seeing clearly and digitally

Couple of updates for tonight.

First off, a shiny new “rear script” emblem showed up in the mail Thursday. The original has the “n” snapped clean off and nowhere to be seen, so this will serve as a replacement. It will also be scanned in and turned into vector art for my own uses and to share with the Morgan owning community.

Next up, the Morgan’s original dash (pictured below on my ‘new’ Corvette hood) is off at Advanced Laser & Waterjet Cutting to get scanned. They’ve got the tools to scan the whole thing and digitize the shape, so I can reproduce it on the CNC router at work. I’ll be using their waterjet services in the future, but the dash has rounded edges and other feature that they can’t do, plus I’ll be redesigning it some and will have to clean up the outline.

Following that, as you’ll see below, I got the emblem out of the mold! It’s still slightly flexible after two days of curing, so I’m going to let it set out on the countertop over the weekend before I start attempting to clean it up any. It turned out quite nice, despite all the imperfections of the original (combined with this being the first time I’ve ever made a casting like this). I need to read up some on how to properly ‘fix’ the casting, since it’s taken long enough to get to this point that I don’t really want to mess it up.

Finally, on an interesting point, I’ve found out there’s a company in the UK that makes fiberglass “wings” (fenders) for the Morgan. I’m attempting to get a hold of them as I may be interested in just getting brand new fiberglass fenders (possibly front and rear) as opposed to currently spending the money to repair the originals. Both front “wings” have damage from the original accident, and the passenger’s side (left hand drive) is significant damaged on the leading edge. I have great quality rear fenders, so those may stay as metal, we shall see!

Posted in 1966 Morgan +4, Upgrades | Leave a comment

Casting call (continued)

One step forward for the custom emblem designing!

After dinner I went out to the garage and checked on the mold material, and it appeared to have cured completely. After some prying with a flathead screwdriver I managed to get the glued together ‘frame’ peeled back, and the whole mold came out in no time.

I cleaned up a few little bits of debris that had pulled off the emblem and stuck to the mold, then mixed up a batch of casting resin and poured it on in. A few bubbles were worked out with a small nail, and now it’s another day’s wait for the casting to cure and pull that on out!

For anyone interested, the mold making material is Tap Plastic’s “Silicone RTV Mold Making System”, and the resin is their “Clear-Lite Casting Resin”.

Posted in 1966 Morgan +4, Upgrades | Leave a comment

Casting call

Between work, other projects, and just not having too much energy in the evenings lately, I’m about a week late at getting the rest of the LED boards soldered, buuuuuut~ I’ve done that and got an extra surprise for you!

I stopped by Tap Plastics yesterday and picked up one of their mold making kits, and the Morgan’s front emblem is currently sitting under about an inch of silicone RTV mold. This is going to be the start of a little project to try and make a “MOGROD +4” front emblem for the car. It’ll be interesting to see if it goes anywhere. At the very least, I can attempt to make a copy of the emblem that doesn’t have all the pitting and corrosion. In the end, a new emblem costs about ~$130, so it’s worth giving it a try and if nothing comes of it, I’ll just order a new one.

I took the time to get the LED contacts all soldered in place, and will hopefully start the wiring in the next few nights.

In other news, a “this for that” deal may be developing that could result in some rather cool possibilities for the Mogrod’s final “paint”… more to come on that as / if it develops!

Posted in 1966 Morgan +4, Restoration, Upgrades | Leave a comment

Some light work

Did some ‘endurance’ testing on the completed running light while I assembled the remaining LED boards. I set up the light on the Avalanche and left it running for about an hour and a half to see how hot it’d get. The laser-thermometer we have registered about 115-125* F on the hottest parts of the board, with the dome getting up to about 100* F. While this definitely qualifies as ‘warm’, considering I could still briefly touch the surfaces and not get burned, this is a definite improvement over standard bulbs like most of our other cars have.

The remaining boards went together easily enough, though I did use a pencil to trace the planned solder / wire routes on the brake / tail lights, as I was rotating a few of the LED’s to accommodate a easier pathway. I’ll hopefully start soldering the remaining boards tomorrow night, and will be using a high-temp silicone I grabbed from work to seal in the solder and wiring once all the boards have tested ok.

To resolve the visibility issue with the running lights and front signals, I’ve got three relays on order that I will wire in such a way that turning on the headlights turns off both running lights, but turning on a signal turns off just that running light. It was a pretty simple yet ingenious layout our electrical engineer at work helped me figure out.

Posted in 1966 Morgan +4, Upgrades | Leave a comment

Signaling a new future

So the first LED turn signal & running / reverse light board is complete! This last bit of soldering went along pretty quickly, with only one minor issue of a solder joint between two orange LED’s getting heated and coming off. That was repaired and the board was tested with a clear lens.

I’ve put a video recording of the first testing below. As expected, the low light combined with the bright LED’s pretty well blew out the camera’s ability to pick up the lights properly. The white LED’s are plenty bright, and will almost certainly be turned off at night time as they’ll be overkill, but will work incredibly well as reverse lights. Contrary to what you see in the video, the turn signals are visible when the running lights are on, however I will be looking into ways to turn off the running lights while the turn signals are engaged. I know of a couple different ways to do this, but will be researching it before acting on it. Any suggestions are always welcome, too!

Posted in 1966 Morgan +4, Upgrades | Leave a comment

Soldering on

Picked up a “handy helper” from Fry’s today since I knew I wouldn’t be able to try and hold everything in place while soldering the first of the lights together, definitely a worthwhile buy. Next, I need to sort out a better place to solder, cause just doing this first assembly has left my back hurting from leaning over the garage workbench.

Those issues aside, the soldering of the first light went well enough. I’ll try to get the wiring and resistors in place tomorrow night so I can do an official test. I’m also trying to figure out the best material to “coat” the backside of the boards with to protect the solder and keep it clean and dry. I’m thinking some high-temp silicone we picked up from Grainger for work recently may be the ticket. That won’t go on until I’ve thoroughly tested the lighting, as I really don’t want to have to try and remove the stuff after finding an issue. The LED’s all seemed to be rather secure after I put a drop of solder on each leg, and that combined with bending over the legs to hold them in place looks like I will get good results if my wiring holds up.

Posted in 1966 Morgan +4, Upgrades | Leave a comment